Loading component...

Loading component...

Loading component...

Now that you know the golden rule—carve in the kitchen—here are the rest of the details you need to slice and serve your holiday ham!

What You’ll Need for Carving

To carve a ham efficiently, you don’t need anything special—just a couple of workhorse tools. Here’s what we recommend:

  • A Large cutting board. If you have one with a moat, groove around the edge to catch juices, you’ll find it handy here.
  • A chef’s knife, 8-10 inches. The one you use every day will serve you just fine—no need for a special carving knife here.

Steps for Carving a Ham

Once you’ve brought the ham out of the oven, hold on for a minute. Actually, 15 minutes is more like it—that’s how long you’ll want to let your ham rest before carving. Letting the meat rest is important for two reasons. First, it allows the juices to redistribute, so the meat doesn’t lose all its moisture (and tons of flavor) when you cut into it. Second, it helps you avoid burning yourself. Sound good? Good! Now, keep that meat warm during the resting period by covering with aluminum foil.

With your ham rested and ready, here’s what you’ll do next:

1.  Place ham on a large cutting board with fat side up and bone facing you. Cut ham in half, avoiding the bone.

how-to-cook-a-ham_11
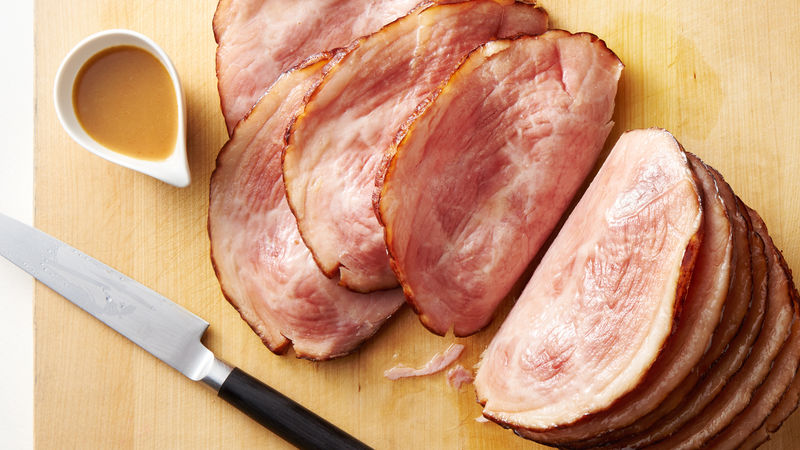
2.  Place boneless side of ham, fat side up, and cut into slices. Cut slices from bone-in portion, cutting away from bone.

Loading component...

Loading component...

Loading component...

Loading component...

Loading component...

Loading component...

Loading component...

Loading component...

Loading component...

Loading component...

Loading component...

Loading component...

Loading component...

Loading component...

Now that you know the golden rule—carve in the kitchen—here are the rest of the details you need to slice and serve your holiday ham!

Loading component...

Loading component...

Loading component...

Loading component...

Loading component...

2.  Place boneless side of ham, fat side up, and cut into slices. Cut slices from bone-in portion, cutting away from bone.

Loading component...

Loading component...

Loading component...

Loading component...

Loading component...

Loading component...

Loading component...

Loading component...

Loading component...

Loading component...

Loading component...

Loading component...

Loading component...

Loading component...

Now that you know the golden rule—carve in the kitchen—here are the rest of the details you need to slice and serve your holiday ham!

Loading component...

Loading component...

Loading component...

Loading component...

Loading component...

2.  Place boneless side of ham, fat side up, and cut into slices. Cut slices from bone-in portion, cutting away from bone.

Loading component...

Loading component...

Loading component...

Loading component...

Loading component...

Loading component...

Loading component...

Loading component...

Loading component...

Loading component...

Loading component...

Loading component...

Loading component...

Loading component...

Loading component...

Loading component...

Loading component...

Loading component...

Loading component...

Loading component...

Loading component...